
My Mirage 3 Build.
The 1/48 Mirage 3 by Academy has gotten many negative criticisms for the lack of detail that it provides the modeler in terms of the interior design of the model. It has also come to light for many that the true scale is actually 1/50 instead of the stated 1/48. I bought this kit as a practice kit because it was cheap and I wanted something I hadn’t modeled before. This kit fit that bill.


First Impressions. I had built many models over the years but never seriously. As a kid lacking in tools such as airbrushes and funds to buy the correct paints I mainly built them as hacksaw-make-do kits. So I have some experience in what makes a nice kit and what doesn’t. Academy typically makes fairly well put together kits with only a few niggles here and there to deal with. Knowing that I came in expecting their usual quality.
Upon opening the box I was surprised at the scale. Mainly because I had thought I bought a 1/72 kit as the box size suggested. An Academy Spitfire mk.XIV comes in the same size box and is 1/72 scale. What this says about the Mirage in terms of parts included is something we will have to see.
Parts were big, smooth and generally appeared to be of good quality with panel lines and rivets subtly laid out throughout the airframe. The kit comes with a pilot, a welcomeaddition if not for the fact that he look like an undernourished fetus. Other than that the only thing lacking significantly was the cockpit detail (which I will get to later) and the instruction booklet. Or pamphlet in this case.
The instructions were mind-bogglingly simple with no indications of colors for parts and muddled part way-finding. Nor is there a part locator diagram which is useful to know if you missed any parts. This is partially alleviated by the fact that the Mirage is fairly simple in exterior design features but a clearer instruction sheet would not be out of place. Regardless, you get a single page with 4 panels for assembly and camo-livery paint guide on the back. Compared to the 3 page, 5 step manual of the Space Shuttle model which has literally 10 parts (that you use) and the 8 page, 14 step manual of the 1/72 Spitfire, it’s almost comical to think that they come from the same company.
Starting the Build


After reading several other builds on the internet, I made up my mind to try some improvements to the model, something I have never done before. First things first was the cockpit. Looking more like a stone bench than a cockpit, it was one part I knew I had to try to improve.
The first steps were to test fit the fuselage and the cockpit components to see how bad it really was. Fit wasn’t bad but details were definitely lacking. I decided to assemble the cockpit tub and add onto that as a base rather than start from scratch. I didn’t want to try 100% realism but I wanted it to at least LOOK real.
What became obvious from comparisons to photographs was that the seat was way too far back. The seat should be around the middle of the rear canopy section. On the model it was located around ¾’s the way back. To remedy this I decided to use the existing seat as the backboard of the cockpit instead of moving everything forward, which would be much more work. Curiously, from what I can tell, it looks like this is the way the model was originally designed. The seat on the floor of the cockpit ends right where I plan to put my new seat and the tab that holds the radio bulkhead is about the right height for the side instrument panels. Had the cockpit been made more detailed they would be logical mounting spots. But I presume cost cutting by senior managers meant that the parts were simplified/removed and the pilot added to hide the majority of the interior.
Cockpit and Pilot


So as I mentioned previously, I began work on refurbishing the cockpit and pilot. I chose to use Sculpey clay as my modeling material of choice for two reasons. The first, I couldn’t find my tubes of epoxy putty. The second, I wasn't sure how good my sculpting skills were and didn't want to be put on a timer while sculpting the thing.
The first thing I did was to trim the bottom of the existing seat back before cementing it to the tub to make it lean back more so I would have room to put my sculpted bits a bit better. After that I used a bit of brown modeling clay to hold the tub and seat still while I attempted to carve out a decent Mk.4 ejection seat. As this was to be stand off scale, I didn't bother to measure out anything. It would probably just make things harder. And as it turns out this process wasn't too hard. Basically its like making clay marshmallow shapes with a halo on top for an ejection handle. I used the mutated fetus of a pilot as a guide for size. After the seat was mostly done, I added the side instrument panels. Basically trapezoidal blocks on either side of him.
By this point, the seat was mostly done and the time had come to bake it. What I didn’t count on was that pulling off the sculpey would deform the sculpt. So began about half an hour of slowly peeling off the clay with a knife and reshaping any dents I made. Eventually I did get it out and baked it. Once dry I glued it onto the tub and sanded the sides to fit. I also test fitted the canopy and fuselage to make sure everything fit. The seat and tub was then painted with Tamiya flat black enamel and Lemon Yellow stripes added to the ejection handle.
The forward instrument panel is overall stock out of box. I did add some wires and pipes using enamel putty to give it some life. It was also painted black and given some aluminium silver weathering.
For the pilot, I sanded off the arms and clipped off his legs. His legs wouldnt be visible and were getting caught on the new side instrument panels. The arms of the original pilot were horrible and fetus-like so after removing them, I used some additional putty to carve out some rough arm shapes. I then painted him and mounted him in the cockpit and to my elation, he looked like a pilot instead of a corpse! Masking tape was used for the seat harness. Cut into strips and wiped with some brown paint, it gives a good impression of cloth straps. A little bit of silver was painted on for the buckles but that didnt really work.
Overall though, I'm happy with the way things came out in the cockpit. Which is more than I can say for the landing gear.
Landing Gear


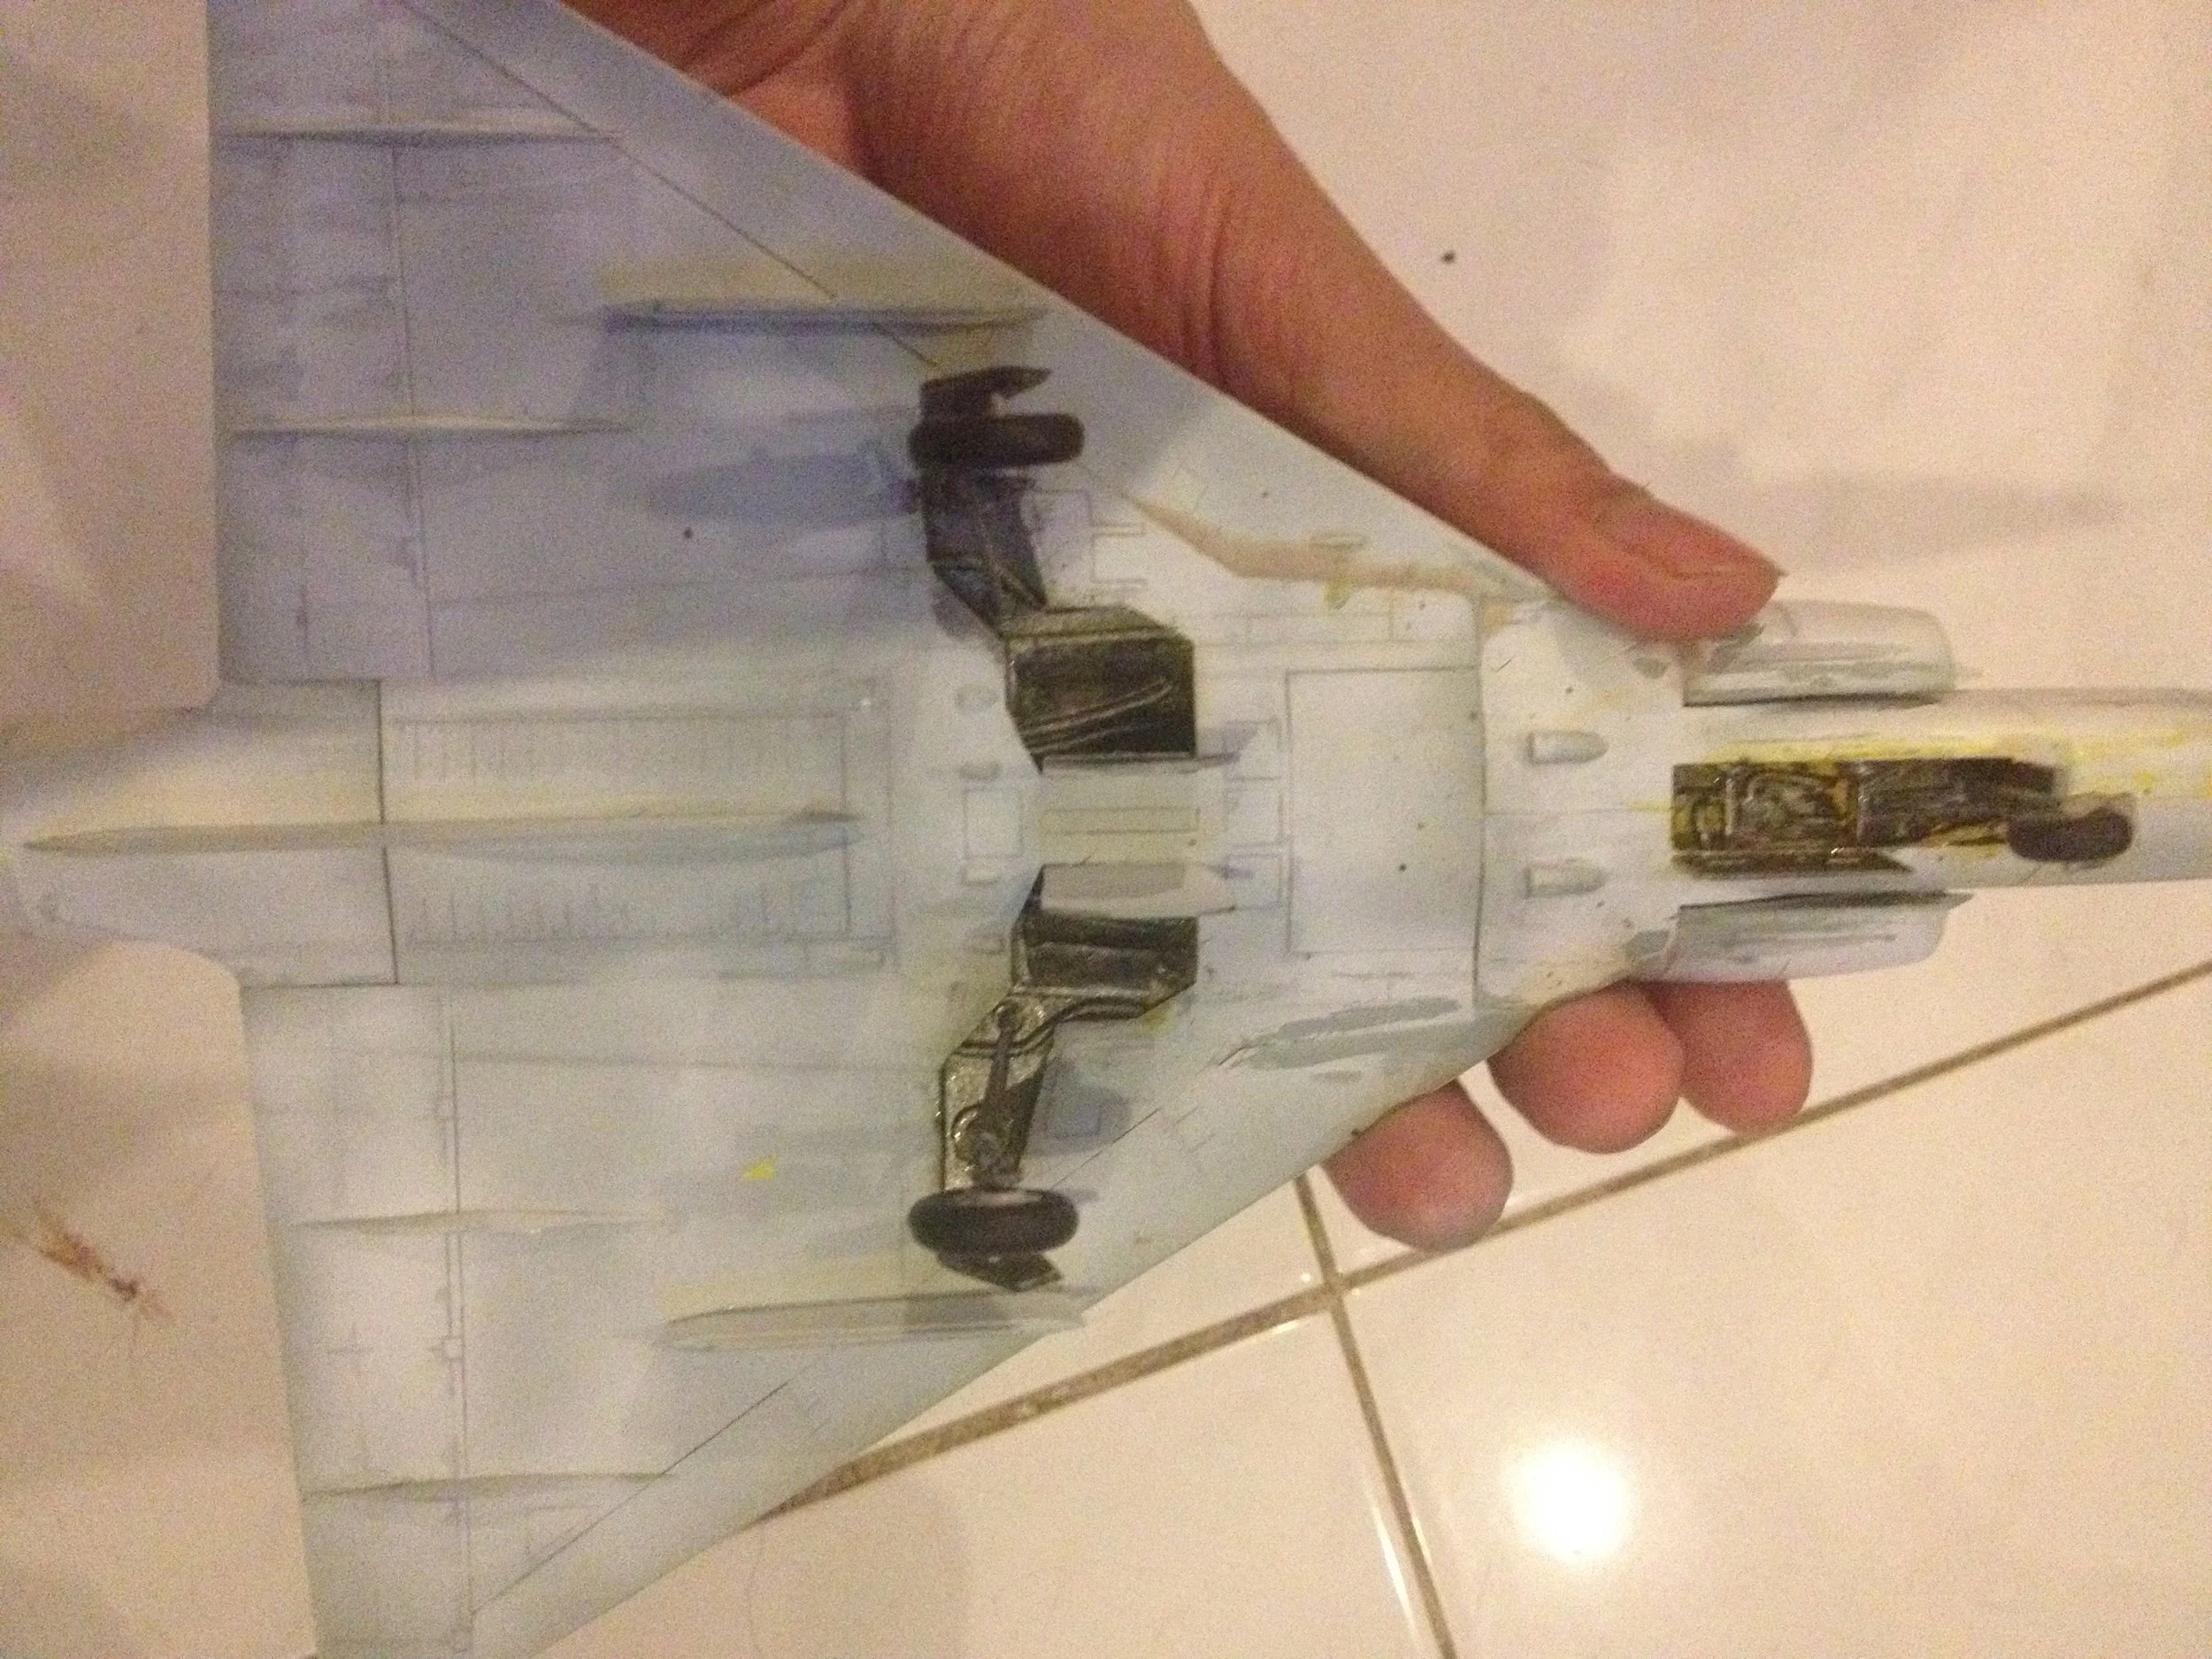
The landing gear bays on this kit is another part of this kit that has been heavily critisized for being very basic. And by basic I mean they exist. That is the extent to which this kit models the bays. So to fix this I started with the front gear bay and mounted the now finished cockpit tub to one half of the fuselage, installing the existing landing gear mounting plate as well. I then cut a piece of styrene and heat bent it on one end to somewhat simulate what my reference photos showed. I did a similar thing to the rear landing gear bay to give it a ceiling. Any holes left over were then filled in with epoxy putty.
For the details, in the front I used small wooden sticks leftover from some incense I had leftover. These made up the "structural" details of the gear bay and then rolled epoxy putty was used for the piping and cabling. In the rear bays however, I used short lengths of guitar wire. The texture of the winded wire simulated tubing very convincingly and is cheap if you play the guitar as you get up to four lengths of string in various thicknesses.
I painted the bays yellow green initially and then aluminium grey inside to weather it. It worked well on the front bay but on the rear bay it never really worked out and I ended up just painting it all aluminium grey. I'll probably try to add some color once I clear coat it but it works for now. I painted the actual landing gear with aluminium, gun metal, brown and black to get it a bit grimy looking. Its not a prominent effect but I think it adds value to the gear assembly.
Painting


Once the gear was done, I masked and hit the entire model with a layer of Mr.Base White 1000. I never properly painted my models in the past let alone so this was a learning curve on how much primer I actually needed. I practiced on a 1/72 Spitfire before the Mirage and that turned out pretty well.
After the primer layer, I tinted the panel lines with a thin solution of grey and gunmetal. I applied it very thinly to practice weathering that I would use after the top coat. It still shows somewhat but nowhere near as much as I'd like. But its a minor issue.
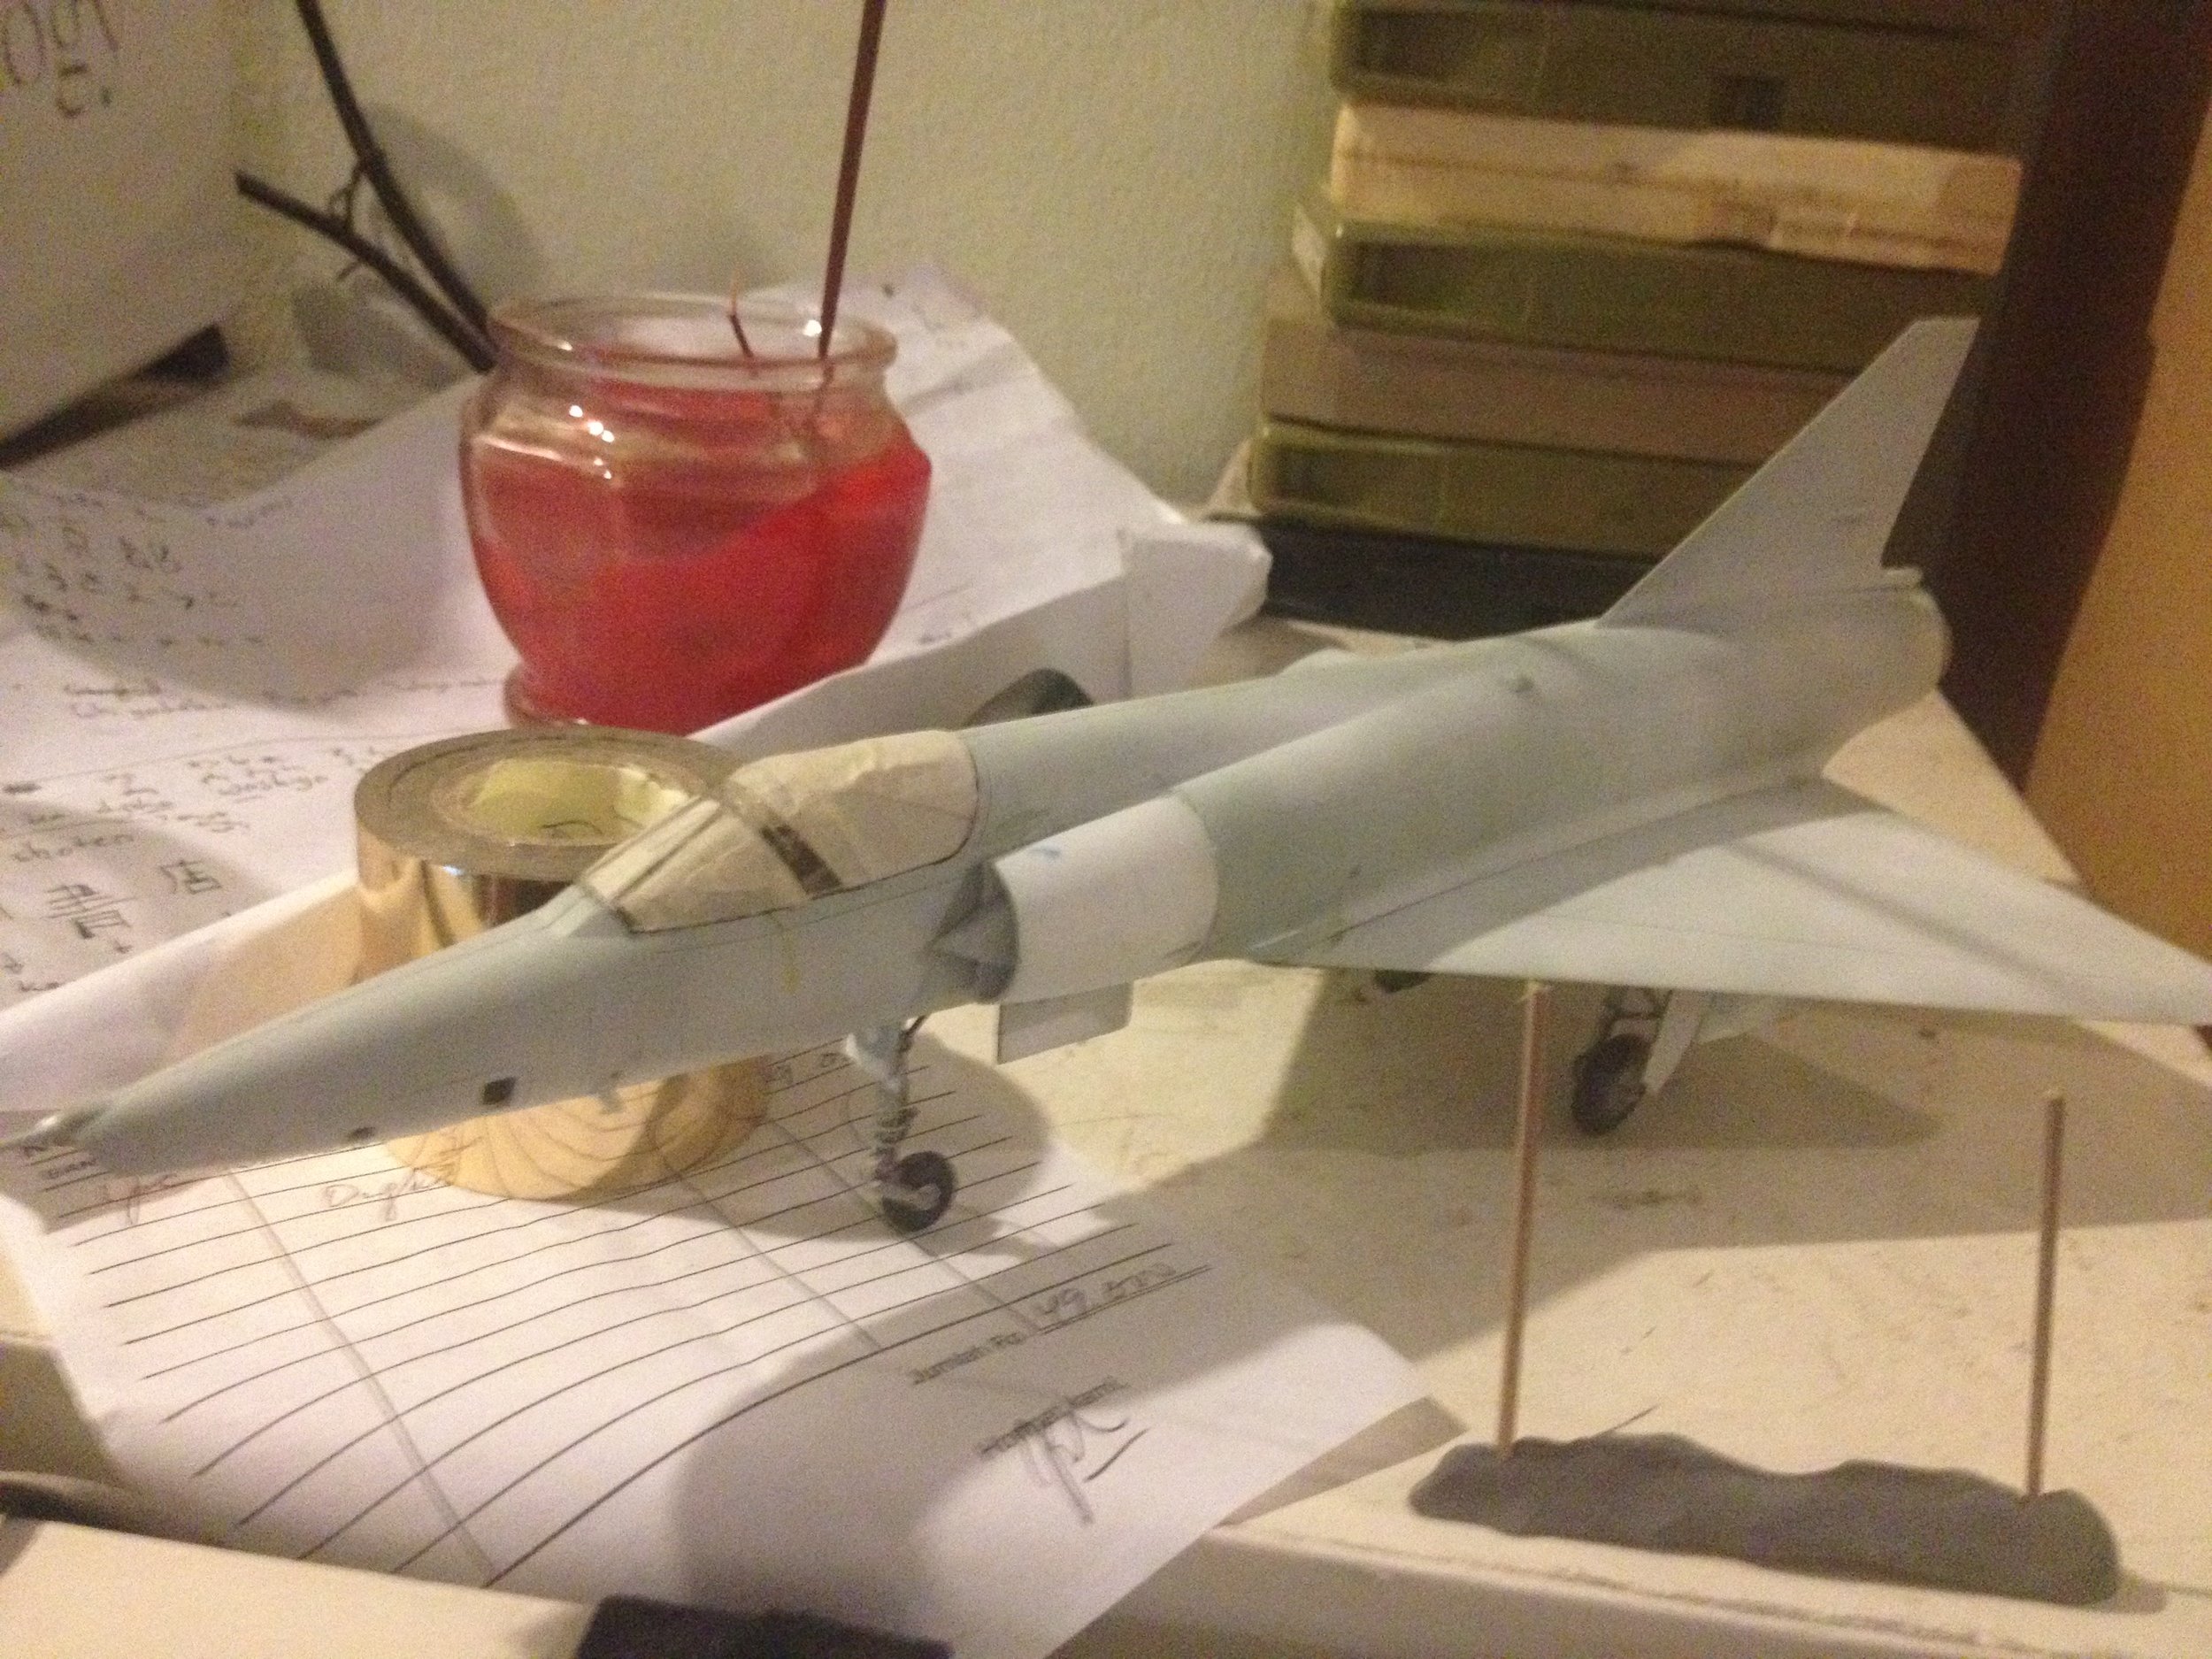
For the camo I used Gull Grey on the bottom, with Dark Ghost Grey and European Green for the top. I laid out several strips of masking tape and cut out curves that I then spliced together to form the camo pattern. To ensure the tape didn’t pull off too much paint, I rubbed it on my trousers beforehand. This worked to an extent but also made some edges lift giving a fuzzy edge that needed extra attention. As for the drop tanks, they were listed as being silver so I mixed a light grey and aluminium grey to get a satin silver on them.
Current Status
At this point the model I feel looks rather swanky. Its not finished, not by a long shot. Weathering, top coat, decals. All still need to be added. Not to mention that I found out while writing this down that the cement I used to affix the canopy fogged up. But live and learn I guess. I'll continue this project and update it once I get a lacquer clear coat to use. Surprisingly Ace Hardware doesn't have any left so I guess I’m stuck with the modeling grade stuff. Watch this page for updates!
Update!
Put on the decals! But after being left for a while it has collected some dust. It does age the appearance somewhat so not all is lost perhaps.


